If you’ve been around here for a while you know my sister and I like to go all out for the nieces’ birthday parties (ahem ahem). This year proves to be no exception. After some convincing and bribery we talked L into having what we’ve been calling an “Octopus’s Garden” Birthday Party. But really it’s more of a Beatles Bash/underwater fun extravaganza.
We knew we wanted a yellow submarine for the kiddos to take silly pictures with and then of course I had to make my obligatory birthday picture outfit. I went with this magnificently mod number. Fun fact – L was totally against having the ruffles in the front and after much reasoning and pleading I finally offered her one solitary m&m if she’d agree she’d wear it for the picture. She said “Fine!” like it was some crazy arm twisting and after I had it sewn up she was in love and didn’t want to take it off. Which of course I knew she’d like it silly girl why won’t she just trust me to begin with!
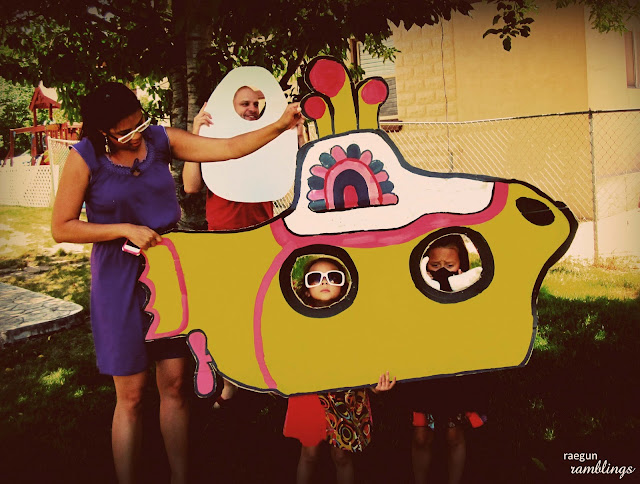
To make your own yellow submarine photo prop pull up the original to have for a frame of reference. We used this one.
Then we used a cardboard we had saved from our last Ikea purchase and freehanded the basic shapes.
We decided we would make it more simple and just use a few colors: yellow, white, blue, red and pink which was a mix of red and white. And then I decided to outline it in black which I think added a lot. I highly recommend marking the color areas. I may have painted the white part yellow first oops.
After letting it dry we cut it out with the junkiest scissors I have since cardboard is great for wreaking scissors. We held it up for pictures but we’re planning on taping a few yard sticks to the back for the actual party to set up a photo station.
We’ll probably use this shot that my sister got on her phone (and of course I had TWO cameras out including my DSLR but of course this is the ONLY one where everyone is looking the right direction). And yes that’s the Egg Mad, Walrus and the octopus who owns the garden ;)

Beatles Yellow Submarine Photo Prop
Instructions
- We used a cardboard we had saved from our last Ikea purchase and freehanded the basic shapes.
- We decided we would make it more simple and just use a few colors: yellow, white, blue, red and pink which was a mix of red and white. And then I decided to outline it in black which I think added a lot. I highly recommend marking the color areas. I may have painted the white part yellow first oops.
- After letting it dry we cut it out with the junkiest scissors I have since cardboard is great for wreaking scissors. We held it up for pictures but we’re planning on taping a few yard sticks to the back for the actual party to set up a photo station.


MommyTanya says
Creeyp Egg Man!!! I emailed you all my pics.
Debra says
So cute! I love this cute shoot! What a great idea!
Rose Jes says
So cute and fun for the kid.
{Hugs} Rose @ http://www.arosiesweethome.com/
Kassi Mortensen says
What a fun party theme!! Love her ruffled outfit too!
shopannies says
how fun love how you all worked on the project
come see what i shared at http://shopannies.blogspot.com
Art Mama says
Love this! The first word my elder daughter learned to sigh read was “Love” because of the movie.
Tara @ Tales of a Trophy Wife says
This maybe the coolest ever b-day theme!
Cody says
That is too cool!
Gina @ Gigi Marie Photography says
SO CUTE!!!! What a great idea!
Christine says
HAHAH You’re awesome!!! Love this!!
Thank you for sharing this at The DIY Dreamer.. From Dream To Reality!
Happy Whimsical Hearts says
Hahaha, that is awesome! Love the photos with the gorgeous prop!! Thanks for sharing on Happy Family Times :-)
Six Sisters says
This is such a fun idea! Love the Beatles!! We appreciate you linking up to our Strut Your Stuff Saturday link party! Please come back again soon! -The Sisters
Carrie says
Oh, how fun!! What a great party idea. Thanks for sharing on Happy Family Times!